
As an Amazon Associate I earn from qualifying purchases.
Installing a dust separator is one of the simplest ways to improve dust collection in a small woodworking shop. When properly installed, it catches most wood chips and heavier debris before they reach your shop vacuum or dust collector, helping keep the filter cleaner and reducing how often you need to empty the main collection unit.
However, a separator can also create problems if you install it with the wrong hose diameter, poorly sealed connections, or a collection bucket that cannot handle the vacuum pressure.
In a one-car garage workshop, there is another consideration: space. Your dust separator needs to work without making it difficult to move tools, access your machines, or clean the floor.
This guide explains how to install a dust separator step by step, choose the right container, connect the hoses, prevent air leaks, and test the finished system. It also explains the difference between a shop-vac separator and a larger cyclone designed for a dust collector.
What You Need Before Installing a Dust Separator
Before assembling anything, identify the type of collection system you have. A cyclone separator designed for a shop vacuum is not necessarily suitable for a conventional dust collector with 4-inch ductwork.
For a typical small garage shop, your installation will usually fall into one of two categories:
- Shop vacuum system: A compact cyclone separator installed between the woodworking tool and the shop vacuum. This arrangement works well with sanders, routers, track saws, and general cleanup.
- Dust collector system: A larger separator designed for higher-volume airflow, typically connected to a 4-inch or larger collection system. This is more appropriate for machines that produce substantial amounts of chips.
Gather the following supplies before starting:
- A cyclone separator compatible with your vacuum or dust collector.
- A rigid collection bucket or drum with an appropriate lid.
- Hoses that match the separator ports and machine connections.
- Compatible reducers and adapters, if necessary.
- Hose clamps or suitable connection fittings.
- Gasket material for sealing the container lid.
- A measuring tape and basic hand tools.
- A stable cart or mounting platform, if you want a mobile installation.
Check the separator manufacturer’s instructions before purchasing the container. Some cyclone designs require a particular lid, bucket diameter, or mounting arrangement.
| Dust Separator Product | Best For | Check Price |
|---|---|---|
| Oneida Dust Deputy 2.5 DIY | 2.5-inch shop vac systems | View on Amazon → |
| Oneida Dust Deputy Low-Pro Deluxe | Compact 5-gallon mobile setup | View on Amazon → |
| Oneida Super Dust Deputy 4/5 | 4-inch dust collector systems | View on Amazon → |
Step 1: Plan the Airflow Path Before Mounting Anything
The first step is deciding where the separator will sit in relation to your woodworking machine and vacuum.
For a standard shop-vac cyclone installation, the airflow path should be:
Woodworking tool → Separator inlet → Separator outlet → Shop vacuum
The dirty air enters the separator from the tool. The cyclone creates a rotating airflow that drops most heavier debris into the collection container. The remaining air continues through the outlet toward the vacuum.
Pay close attention to the inlet and outlet markings. On many cyclone separators, the angled side port is the inlet, while the upper port connects to the vacuum. However, designs vary, so follow the manufacturer’s markings rather than assuming every model uses the same arrangement.
Keep the hose route as short and direct as practical. Long hoses, restrictive adapters, tight elbows, and poorly matched fittings can reduce airflow.
A shop vacuum produces relatively high static pressure through a smaller hose, but its airflow is limited compared with a dedicated dust collector. You can learn more about this difference in our guide to CFM vs. suction for dust collectors.
For a one-car garage workshop, placing the separator close to the vacuum is often the easiest arrangement. You can mount both units on one rolling cart and move them between a table saw, miter saw, router table, or sanding station.
If your dust collector stays in a fixed location, position the separator where you can access the collection drum without moving the entire machine.
The best location is one that balances three things:
- A short, practical hose connection.
- Enough clearance to remove and empty the container.
- A position that does not interfere with your normal work area.
Do not sacrifice convenient access just to save a few inches of hose.
Step 2: Choose the Right Collection Bucket or Drum
The collection container is an important part of the installation. It must hold debris without leaking air or deforming under vacuum pressure.
A standard 5-gallon bucket is a common choice for compact shop-vac separators. It works well for occasional cleanup, sanding, and smaller woodworking projects.
However, a small bucket can fill quickly when connected to a planer or another machine that produces large quantities of wood chips.
Larger drums, such as 14- to 30-gallon containers, offer more capacity, but they also require more floor space. In a small garage, the additional storage capacity may not justify the larger footprint.
Consider the following differences:
| Container size | Best application | Main consideration | |—|—|—| | 5 gallons | Shop vacs and light cleanup | Fills quickly | | 10–14 gallons | Regular small-shop use | Good balance of capacity and size | | 20–30 gallons | Higher chip production | Requires more storage space |
These are practical container categories, not universal separator capacity requirements. Always check the separator manufacturer’s specifications.
Pay attention to bucket strength.
Not every plastic bucket is suitable for a cyclone separator. A thin container can flex inward or collapse when the vacuum creates negative pressure.
Use a rigid container designed for vacuum service or one specifically recommended by the separator manufacturer.
Before mounting the cyclone, inspect the lid and rim. The sealing surface should be flat, and the gasket should make continuous contact around the entire opening.
A poor seal allows outside air to enter the system and can interfere with separation performance.
Step 3: Match the Hose Diameter to Your Dust Collection System
Hose diameter is one of the most important installation decisions.
A separator with a 2-1/2-inch connection is generally intended for a shop-vac system. A larger dust collector may require a separator with 4-inch or larger connections.
The mistake is assuming that adapters can solve every size mismatch without affecting performance.
Every unnecessary reduction adds resistance. This can be particularly noticeable when a smaller vacuum is already working near the limits of its available airflow.
For example, a 2-1/2-inch shop-vac hose connected to a small sanding tool may work well with the appropriate adapter. However, using that same narrow hose throughout a system intended for a 4-inch dust collector can significantly restrict the airflow available to larger machines.
For a better understanding of the available options, see our guide to dust collection hose size, length, and fit.
Here is a practical way to approach hose sizing:
- Keep the main hose or duct as large as the system and separator allow.
- Use reducers only where the machine connection requires them.
- Keep smaller flexible connections as short as practical.
- Avoid unnecessary adapters between the separator and collector.
- Measure the actual fittings before ordering replacement hoses.
A fitting advertised as 2-1/2 inches may not fit another manufacturer’s 2-1/2-inch connection perfectly. Some manufacturers measure the inside diameter, while others specify the outside diameter.
Measure the actual connection rather than relying only on the nominal size.
Shop Vac Hose vs. 4-Inch Dust Collector Hose
These two systems serve different purposes.
A shop vacuum is generally better suited to smaller tools with relatively narrow dust ports. Sanders, routers, track saws, and portable tools are common applications.
A 4-inch dust collector is designed to move a substantially larger volume of air through larger openings. It is more appropriate for machines such as planers, jointers, and many table saws.
The correct separator must match the system it serves.
Do not assume that adding a cyclone to a shop vacuum turns it into a full-size dust collector. A separator removes debris from the airflow; it does not increase the vacuum’s available CFM.
You can also read why a 4-inch dust inlet matters when choosing a dust collection setup for larger woodworking machines.
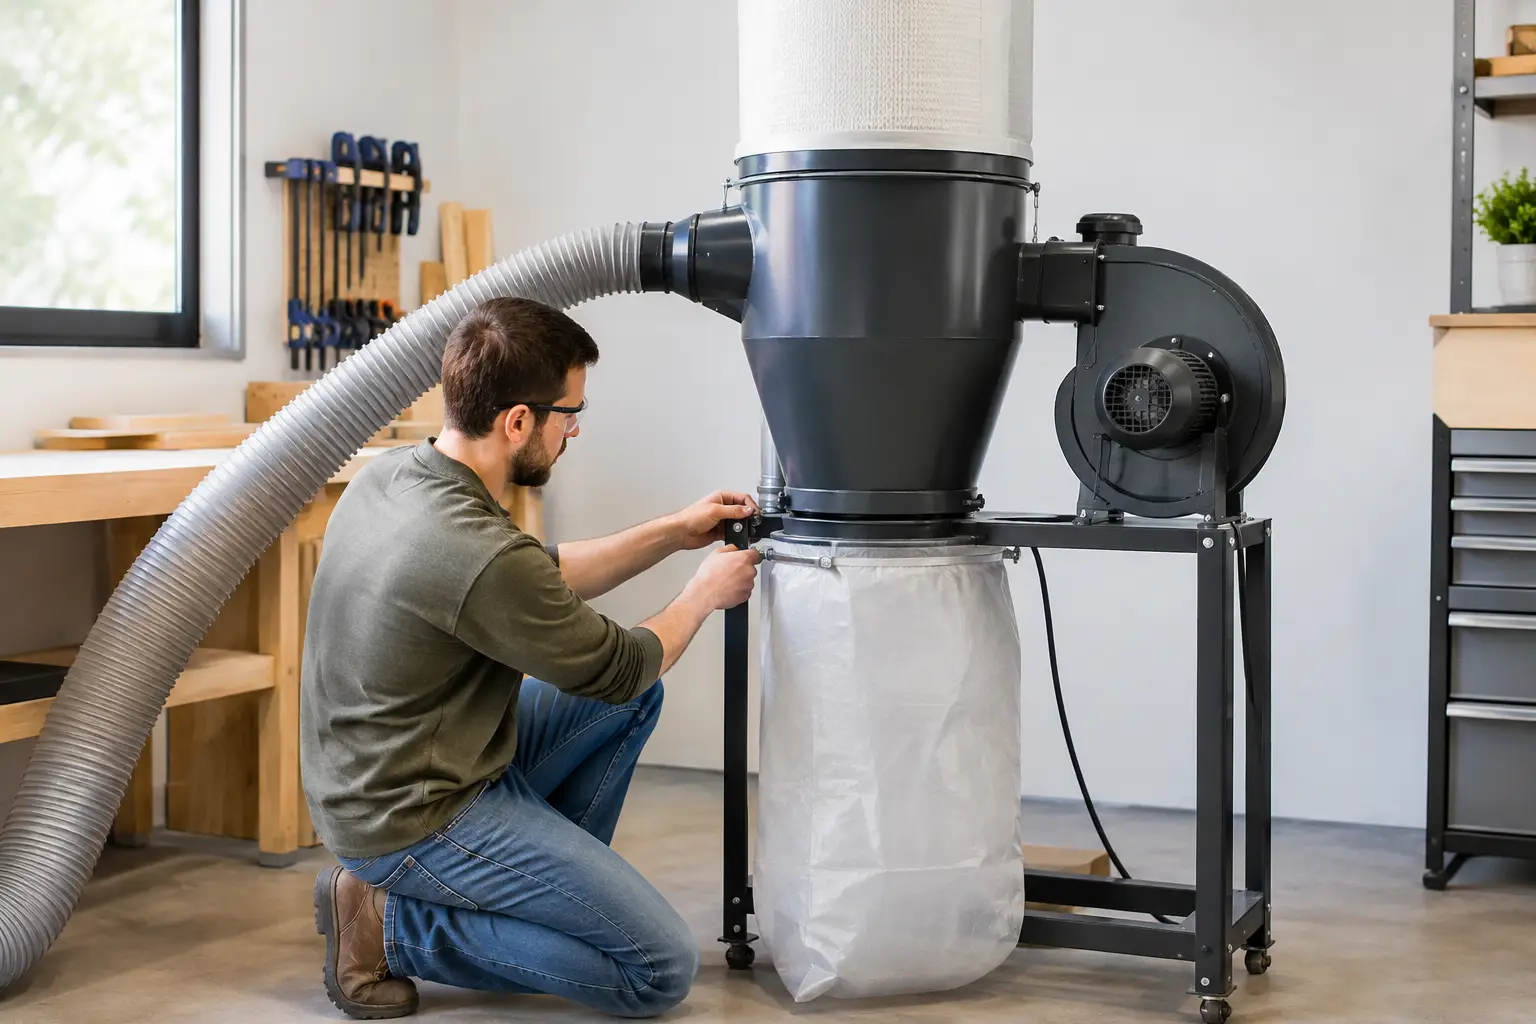
Step 4: Mount the Separator on a Stable Base
Once you have selected the container and confirmed the hose connections, assemble the separator.
For a portable shop-vac system, a rolling cart is often the most practical solution.
A good layout places the collection container low, the separator securely mounted above it, and the shop vacuum in a position where its filter and tank remain accessible.
Keep the center of gravity as low as possible. A tall separator assembly can become unstable when you pull a hose sideways or move the cart across an uneven garage floor.
Before securing the components permanently, check:
- Whether the collection drum can be removed without dismantling the cart.
- Whether the separator lid can be opened easily.
- Whether the vacuum can be emptied and serviced.
- Whether the wheels lock securely.
- Whether the hose connections remain accessible.
- Whether the assembly fits through the available garage space.
Avoid mounting the separator so high that emptying the container becomes inconvenient.
A system that is difficult to service is more likely to be neglected.
Organize the Hoses and Electrical Connections
A compact dust collection cart should also make daily operation easier.
Install hose hooks or a simple storage bracket to prevent hoses from dragging across the floor. Keep adapters together so you do not have to search for the correct connection every time you change tools.
If you use an automatic vacuum switch, verify that it is rated for the electrical load and starting current of the equipment connected to it.
Do not exceed the switch, receptacle, extension cord, or circuit ratings. Avoid using an undersized power strip to operate a high-draw woodworking machine and a shop vacuum simultaneously.
For a stationary dust collector, a remote switch can make operation more convenient, but it does not improve dust capture at the machine.
Remember that the separator only handles material that enters the collection hose. A poorly designed table saw shroud or miter saw dust hood can still allow large amounts of dust to escape.
Step 5: Seal the Lid, Hoses, and Connections
A cyclone separator needs properly sealed connections to work as intended.
Even a small air leak can reduce the effectiveness of the installation, especially when the system uses a compact shop vacuum.
Start by checking the container lid.
The gasket should sit evenly around the opening. Replace damaged seals, and make sure the lid does not move or flex excessively during operation.
Next, inspect every hose connection.
Use compatible rubber couplers, hose clamps, or manufacturer-approved fittings where necessary. Semi-permanent joints can be sealed with suitable materials designed for the application.
Foil HVAC tape may be useful for sealing appropriate stationary joints, but it should not replace a proper mechanical connection where the hose needs to be removed frequently.
Avoid depending on ordinary duct tape for long-term sealing. Dust, movement, and aging can cause its adhesive to loosen.
Check for Air Leaks
After assembling the system, switch on the vacuum and listen around the container lid and connections.
A noticeable hissing sound can indicate an air leak.
You can also inspect the gasket and fittings for loose sections while the equipment is operating normally.
Switch the machine off and disconnect power before tightening connections, removing hoses, or making adjustments.
Do not block the inlet completely for extended periods or exceed the operating conditions specified by the manufacturer.
Step 6: Keep Hose Runs Short and Avoid Sharp Bends
Once the connections are sealed, organize the hose route.
A separator already introduces some resistance into the system. Adding several tight bends and long sections of corrugated hose can make the problem worse.
Whenever possible, use smooth-wall rigid pipe for longer stationary sections and reserve flexible hose for the connection between the machine and the main collection line.
In a small garage, you probably do not need an elaborate permanent duct system.
A short flexible hose connected to a rolling separator can be more practical because it allows you to move the equipment between workstations.
If you need to change direction, use gradual bends where possible rather than several tight 90-degree elbows.
Also, support the hose so its weight does not pull against the separator lid or loosen a fitting.
A simple wall hook, cart-mounted hanger, or overhead hose support can prevent unnecessary strain.
The goal is to maintain a direct airflow path without creating an installation that restricts your movement around the shop.
Step 7: Test the Dust Separator With Your Actual Tools
Do not assume the installation is working correctly just because the vacuum turns on.
Test the separator before relying on it for regular woodworking.
Start with the vacuum or dust collector switched off. Check that the hoses are connected to the correct ports, the container is properly seated, and the filter is in good condition.
Then run the system using a normal woodworking operation.
For example, you can test it with:
- A random-orbit sander.
- A router table.
- A miter saw.
- A track saw.
- A compatible table saw or planer connected to an appropriately sized dust collector.
Observe what happens during operation.
Check whether the machine captures debris effectively, whether chips accumulate around the tool, and whether the hose remains open without collapsing or clogging.
After the test, switch off and disconnect the equipment before opening the collection container.
Inspect the separator drum and the vacuum tank.
Most of the heavier debris should have dropped into the separator. A small amount of fine dust reaching the vacuum filter is normal, because a pre-separator does not remove every particle.
However, if substantial amounts of chips are reaching the vacuum, investigate:
- Whether the inlet and outlet are connected correctly.
- Whether the container lid is sealed.
- Whether the separator is compatible with the vacuum.
- Whether the hose is obstructed.
- Whether the container is too full.
- Whether the system has excessive restrictions.
Repeat the test after correcting any problems.
Check the Filter After Several Sessions
One of the main reasons for installing a cyclone separator is to reduce the amount of debris reaching the vacuum filter.
After several woodworking sessions, inspect the filter and compare its condition with what you normally experience without the separator.
The separator should collect most of the larger debris and help reduce filter loading.
It does not mean you can stop checking or cleaning the filter. Fine dust can still pass through the separator, and the filter remains an essential part of the system.
Step 8: Maintain the Separator to Keep It Working Properly
A dust separator needs very little complicated maintenance, but a few simple checks help prevent problems.
Empty the container regularly.
Do not wait until the debris reaches the separator inlet. An overfilled container can allow accumulated material to become entrained in the airflow and travel toward the vacuum.
Inspect the gasket.
Check for cracks, compression damage, and sections that no longer seal properly.
Check the hoses.
Look for crushed sections, loose clamps, internal obstructions, and damaged connections.
Inspect the separator body.
Make sure there are no loose mounting screws, damaged fittings, or visible cracks.
Maintain the vacuum filter.
Follow the vacuum manufacturer’s instructions for cleaning or replacing the filter. A separator reduces the debris reaching the filter but does not eliminate the need for filtration maintenance.
If you use the system frequently, make these checks part of your normal shop cleanup routine.
Common Dust Separator Installation Mistakes
Even a good separator can perform poorly when the installation is incorrect.
Here are some of the most common problems to avoid.
| Installation mistake | Why it causes problems | Better approach | |—|—|—| | Reversing the inlet and outlet | Disrupts the intended cyclone airflow | Follow the port markings | | Using a weak bucket | The container may deform under vacuum pressure | Choose a rigid, compatible container | | Leaving loose connections | Outside air enters the system | Seal and secure every joint | | Using undersized hose | Restricts airflow | Match the hose to the collector | | Adding too many elbows | Increases airflow resistance | Use a shorter, smoother route | | Overfilling the drum | Debris can enter the vacuum | Empty it before it gets too full | | Ignoring filter maintenance | Fine dust gradually restricts airflow | Inspect the filter regularly | | Expecting a separator to capture airborne dust | Fine particles can remain suspended in the shop | Use appropriate filtration and source capture |
The biggest mistake is treating a dust separator as a complete dust collection system.
It is only one part of the setup. The machine hood, hose, separator, collector, and final filter all affect the result.
Dust Separator Safety: What It Does and Does Not Protect Against
A cyclone separator helps manage collected debris, but it does not make woodworking dust harmless.
Fine wood particles can remain airborne even when the separator is working correctly.
Use appropriate dust extraction at the machine, maintain the final filter, and consider a suitable ambient air filtration unit if your workshop produces significant airborne dust.
Wear appropriate respiratory protection when working in dusty conditions, especially during sanding, cutting, and cleaning.
Also pay attention to static electricity. Plastic hoses can accumulate static charges during operation. Use manufacturer-approved antistatic components and follow the equipment manufacturer’s grounding recommendations.
Never assume that a separator, ordinary shop vacuum, or basic filter makes combustible wood dust safe. Keep ignition sources away from dust accumulation and avoid creating airborne dust clouds during cleanup.
For more demanding installations, follow applicable electrical, fire, and dust collection safety requirements.
Frequently Asked Questions About Dust Separator Installation
Where should a dust separator be installed?
For a typical shop-vac system, install the separator between the woodworking tool and the vacuum. The tool hose connects to the separator inlet, and the separator outlet connects to the vacuum. Place the assembly where the container is easy to empty and the hoses do not obstruct your workspace.
Does a dust separator reduce suction?
Yes. A separator introduces some additional resistance into the airflow. However, it can help maintain more consistent performance over time by keeping heavier debris out of the vacuum filter. The actual result depends on the separator design, hose diameter, and overall system layout.
Can I use a 5-gallon bucket for a cyclone dust separator?
Yes, if the separator is designed for that container size and the bucket is sufficiently rigid to withstand the vacuum pressure. A standard lightweight bucket may deform, so check the manufacturer’s recommendations before using it.
Can I connect a dust separator to a 4-inch dust collector?
Yes, but you need a separator designed for the airflow and connection size of that dust collector. A small shop-vac cyclone with 2-1/2-inch ports is generally not a good substitute for a properly sized 4-inch separator.
Does a cyclone separator work with a shop vacuum?
Yes. A compact cyclone separator is commonly used with shop vacuums. It collects much of the heavier debris before it reaches the vacuum tank and filter, making it useful for sanding, routing, cutting, and general shop cleanup.
How often should I empty a dust separator?
It depends on the amount of material your machines produce and the container capacity. Inspect the drum regularly and empty it before debris reaches the inlet area. Planers and other chip-producing machines may fill a small container much faster than sanders.
Does a dust separator eliminate the need for a HEPA filter?
No. A cyclone separator is a pre-separator, not a replacement for the final filter. Fine particles can pass through the cyclone, so use the appropriate filter recommended for your vacuum or dust collector.
Final Thoughts: Build a Dust Separator Setup That Fits Your Garage
A dust separator is a practical upgrade for a small woodworking shop, especially when you regularly use a shop vacuum for sanding, routing, cutting, and cleanup.
The installation does not need to be complicated. Choose a compatible separator, use a rigid collection container, match the hose diameter to your equipment, and keep the airflow path as direct as possible.
For a one-car garage workshop, a compact rolling cart is often the most convenient arrangement. It keeps the vacuum and separator together without requiring permanent ductwork or sacrificing valuable floor space.
Most importantly, remember that a separator does not compensate for an undersized collector or poorly designed tool hood. Match the entire system to the machines you actually use, maintain the filter, and keep the collection container accessible.
A well-installed separator should make your workshop easier to clean and your dust collection system easier to maintain, not give you another piece of equipment to work around.

Leave a Reply